Don't Miss

Latest Posts
Browsing Category "Widgets"

Add 2 Advanced Search Boxes to Blogger

- 29 Comments
Few days ago, we discussed about How to Add Google Custom Search Engine to Blogger and today we're going to share 2 Advanced Search Boxes for Blogger. Search boxes are one of the most essential elements of a blog allowing your visitors to search content. It enables readers to search through all of your content and find exactly what they are looking for.

Why is it Important to Add a Search Box? Because your visitors don't have a lot of time to scroll through each and every post you've ever written. So by adding a search box, your visitors can easily search and find the content they're looking for. It is just like an internal search engine for your blog and it will also make your blog user-friendly.
Add 2 Advanced Search Boxes to Blogger
By Default, blogger has its own search box widget but its design is ugly and not attractive. Today in this tutorial we're going to share 2 advanced, clean and attractive search boxes for your blog.
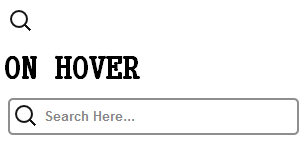
Add an Advanced Search Box to Blogger

First and foremost Log in to your Blogger Account >> Select a Blog >> Click Layout >> Add a Gadget, a popup will appear with the list of gadgets. Select HTML/JavaScript gadget from the list of Gadgets. Now Copy (Ctrl+C) the below code and Paste (Ctrl+V) it in the widget code area.

Style # 1

Add 2 Advanced Search Boxes to Blogger
<style>
.search-box {
background-color: transparent;
background-image: url(https://blogger.googleusercontent.com/img/b/R29vZ2xl/AVvXsEj_hI50xJMTBN-LyxMCIQ24mMMH_fsT4q88yHKlI1Q0nsi4xAMwKzDxwI0xpfCtlNQkfZ76dHHPxW9G5zFAQBh1_6DwKrruE_Z6srebO9tFSb4tVWq2tGYz0O1RxI3A0t_7OCaCug4vSwra/s1600/search-icon.png);
background-position: 5px center;
background-repeat: no-repeat;
background-size: 24px 24px;
margin: 3px 0;
cursor: pointer;
height: 37px;
padding: 0 0 0 34px;
border: 2px solid transparent;
position: relative;
-webkit-transition: width 400ms ease, background 400ms ease;
transition: width 400ms ease, background 400ms ease;
width: 0;
color: #222;
font-family: Arial;
font-weight: bold;
}
.search-box:focus {
background-color: #FFF;
border: 2px solid #8E8E8E;
border-radius:5px;
cursor: text;
outline: 0;
width: 270px;
</style>
<form action='/search' id='search' method='get'>
<input class='search-box' name='q' placeholder='Search Here...' title='Click to Search!' type='text'/>
</form>

Style # 2

Add 2 Advanced Search Boxes to Blogger
<style>
.search-box {
background-color: #2aa4cf;
background-image: url(https://blogger.googleusercontent.com/img/b/R29vZ2xl/AVvXsEj_hI50xJMTBN-LyxMCIQ24mMMH_fsT4q88yHKlI1Q0nsi4xAMwKzDxwI0xpfCtlNQkfZ76dHHPxW9G5zFAQBh1_6DwKrruE_Z6srebO9tFSb4tVWq2tGYz0O1RxI3A0t_7OCaCug4vSwra/s1600/search-icon.png);
background-position: 5px center;
background-repeat: no-repeat;
background-size: 24px 24px;
margin: 3px 0;
height: 38px;
width:280px;
padding: 0 0 0 34px;
border: 2px solid transparent;
position: relative;
-webkit-transition: width 500ms ease, background 500ms ease;
transition: width 500ms ease, background 500ms ease;
color: #222;
font-family: helvitica;
font-weight: bold;
}
.search-box:focus {
background-color: #99E4FE;
border: 2px solid #99E4FE;
outline: 0;
width: 280px;
</style>
<form action='/search' id='search' method='get'>
<input class='search-box' name='q' placeholder='Search Here...' title='Click to Search!' type='text'/>
</form>

Click Save button and you're done.

We hope this article may have helped you in adding a Search Box to your Blog. Share this article with your friends, don't forget to subscribe us and Join our Bloggers Forum on Facebook @ https://www.facebook.com/groups/blogolectforum

Recent Posts Widget with Thumbnails and Tooltip for Blogger

- 3 Comments
Recent posts widget displays the latest posts of a blog. Displaying Recent posts in your sidebar often help your users to quickly take a look at the latest and fresh content. Recent Posts Widget is a great way to keep your visitors browsing, they'll spend more time on your blog which will also decrease your blog bounce rate. It also gives your visitors a basic idea that what kind of content is published on a certain blog.

In this article we'll show you that How to Add a Recent Posts Widget with Thumbnails and Tooltip to your Blogger Blog. This widget shows Recent Posts with their Thumbnails and on hover it shows a short description of that post. So, follow the steps mentioned below to add this widget to your blog.
Recent Posts Widget with Thumbnails and Tooltip

How to Add this Widget to Blogger

Step 1. Log in to your Blogger Dashboard
Step 2. Go to Layout >> Click on Add a Gadget and select HTML/JavaScript Gadget from the list of Gadgets
Step 3. Now Copy the below code and Paste it in the HTML/JavaScript Widget Box


<style type="text/css">
#post-gallery {
  width:300px;
  margin:0px auto;
  font:normal 11px Arial,Sans-Serif;
  color:#494848;
  padding:8px;
  background-color:#17B986;
  -webkit-box-shadow:0px 10px 30px rgba(0, 0, 0, 0.4);
  -moz-box-shadow:0px 10px 30px rgba(0, 0, 0, 0.4);
  box-shadow:0px 10px 30px rgba(0, 0, 0, 0.4);
  -webkit-border-radius:4px;
  -moz-border-radius:4px;
  border-radius:4px;
}
#post-gallery h2 {
  font:20px Arial,Sans-Serif;
  color:white;
  text-shadow:0px 3px 2px black;
  text-transform:uppercase;
  margin:2px 2px 2px;
  padding:7px 14px;
  background-color:#48D;
  text-align: center;
}
#post-gallery .bgt-item {
  float:left;
  display:inline;
  position:relative;
  margin:2px;
  padding:0px 0px;
  background:#fff url('https://blogger.googleusercontent.com/img/b/R29vZ2xl/AVvXsEgtPhpmj6zIGyGjsYhpHT63uRIrayGfcuyAv5TzwzC_zvJTQaa2g9B4DNcFQ8-6F9KjCehQybHi2v3Pmjx6fp2OBGrJEIqahJb-y4YaEecEpuTHeHdPwfubbrGEI9uB3cBYcrMCN2U9LkU/s1600/395.GIF') no-repeat 50% 50%;
  width:71px;
  height:71px;
}
#post-gallery .bgt-item img {
  width:71px;
  height:71px;
  border:none !important;
  margin:0px 0px !important;
  padding:0px 0px !important;
  background:transparent !important;
  display:none;
}
#post-gallery .bgt-item .bgt-child {
  position:relative;
  top:10%!important;
  left:10%!important;
  z-index:1000;
  width:200px;
  background-color:white;
  border-top:5px solid #FA7C19;
  -webkit-box-shadow:5px 5px 10px rgba(0, 0, 0, 0.7);
  -moz-box-shadow:5px 5px 10px rgba(0, 0, 0, 0.7);
  box-shadow:5px 5px 10px rgba(0, 0, 0, 0.7);
  padding:10px 15px;
  overflow:hidden;
  word-wrap:break-word;
  display:none;
  opacity: 0.9;
}
#post-gallery .bgt-item .bgt-child h4 {
  font-size:12px;
  margin:0px 0px 5px;
  color:#FA7C19;
}
#post-gallery .bgt-item:hover .hidden {display:block;}
</style>

<script src="http://ajax.googleapis.com/ajax/libs/jquery/1.8.0/jquery.min.js" type="text/javascript"></script>
<script type="text/javascript">
var bgtTitle     = "Latest Posts",
    numposts    = 16,     
    numchar     = 190,     
    rcFadeSpeed = 610,   
    pBlank      = "https://blogger.googleusercontent.com/img/b/R29vZ2xl/AVvXsEhtA1V9aWG1gp-33KAzeiy6GigmGWfB3K2sU-u2C0qVKHTSnOPy7Z9mb3pDydlC0XcugkK0iDlNZpn1L6j95UBH6C4JZleiytRPjRsKE10pfWYLIjBYURfG1imA5c4w2wAeBYlizHOArqY/s1600/no-image-ava.jpg", 
    blogURL     = "http://www.blogolect.com";
</script>
<script src="https://googledrive.com/host/0B43vwjPtKakCSWx2MEtSRFEzQUk" type="text/javascript"></script>

Customization:
  • Replace http://www.blogolect.com with your Blog/Website URL
  • Replace 16 with the number of posts you want to show
  • Replace Latest Posts to change widget title
Step 4. Hit the Save Button
Thats it...


We hope this article may have helped you in adding a Recent Posts Widget with Thumbnails and Tooltip to your Blogger Blog. Share this widget with your friends and don't forget to Join our Bloggers Forum on Facebook @ https://www.facebook.com/groups/blogolectforum

Add a Tabbed Table of Contents to your Blogger Blog

- 19 Comments
A Table of contents(TOC) or a Sitemap is a place/page where all of your blog posts are arranged according to their categories. A table of contents allow your visitors to access all your posts from one page. As every one loves Easy Navigation, so by adding table of contents your visitors will get more interested after getting all posts on one page, in this way they'll spend more time on your blog and your blog Bounce Rate will also decrease. It also helps search bots to easily index your pages.

Recommended For You:
How to create a Sitemap/Table of Contents in Blogger
How to Add a Post Rating System in Blogger
How to Add a Forum to Your Blogger Blog

Today in this tutorial, we're going to share a tabbed table of contents for blogger. This widget is created by DTE. Some features of this table of contents are:

  • It automatically updates when you publish a post
  • It automatically tags your latest posts with a New! text
  • Arranges all your posts under their given categories
  • Has Beautiful layout and eye-catching colors

A live demo of this widget can be seen by clicking the below Demo button.
Add a Tabbed Table of Contents to your Blogger Blog

Add a Tabbed Table of Contents to your Blogger Blog

First and foremost, go to your Blogger Dashboard >> Select a Blog >> Pages and click New Page. Switch the Page Editor to HTML mode. Now Copy the below code and paste it there.

<link rel="stylesheet" href="http://dte-project.googlecode.com/svn/trunk/tabbed-toc-skin.css" type="text/css" media="screen" />
<div id="tabbed-toc"><span class="loading">Loading...</span></div>
<a style="display:block;text-align:right;font:normal bold 8px Arial,Sans-Serif;text-decoration:none;margin:10px;" href="http://www.blogolect.com/" title="Tabbed TOC">Learn More Cool Tricks - Blogolect</a>
<script type="text/javascript">
var tabbedTOC = {
    blogUrl: "http://YOUR-BLOG-URL.blogspot.com", // Blog URL
    containerId: "tabbed-toc", // Container ID
    activeTab: 1, // The default active tab index (default: the first tab)
    showDates: false, // `true` to show the post date
    showSummaries: false, // `true` to show the posts summaries
    numChars: 200, // Number of summary chars
    showThumbnails: false, // `true` to show the posts thumbnails (Not recommended)
    thumbSize: 40, // Thumbnail size
    noThumb: "http://3.bp.blogspot.com/-vpCFysMEZys/UOEhSGjkfnI/AAAAAAAAFwY/h1wuA5kfEhg/s72-c/grey.png", // A "no thumbnail" URL
    monthNames: [ // Array of month names
        "January",
        "February",
        "March",
        "April",
        "May",
        "June",
        "July",
        "August",
        "September",
        "October",
        "November",
        "December"
    ],
    newTabLink: true, // Open link in new window?
    maxResults: 99999, // Maximum post results
    preload: 0, // Load the feed after 0 seconds (option => time in milliseconds || "onload")
    sortAlphabetically: true, // `false` to sort posts by published date
    showNew: 7, // `false` to hide the "New!" mark in most recent posts, or define how many recent posts are to be marked
    newText: " - <em style='color:red;'>New!</em>" // HTML for the "New!" text
};
</script>
<script type="text/javascript" src="http://dte-project.googlecode.com/svn/trunk/tabbed-toc.js"></script>

Customization:

  • Replace http://YOUR-BLOG-URL.blogspot.com with your Blog URL

Click Publish button and you're done!
Congratulations: You've successfully added a Add a Tabbed Table of Contents to your Blogger Blog.

We hope this article may have helped you in adding a sitemap/table of contents to your blogger blog. Share this article with your friends and don't forget to Join our Bloggers Forum on Facebook @ https://www.facebook.com/groups/blogolectforum

How to Add a Post Rating System in Blogger

- 29 Comments
Post Star Rating system is a great way to get feedback from your visitors that what type of posts they like. It provides a quick way to your visitors to share their opinions with just a simple click. By adding a Post Rating System to your blog, you'll be able to know whether a post is useful for your blog or not.

You may have seen Star Rating system on image websites. These websites use a star rating system for rating their images and checking that what type of images their visitors like.
How to Add a Post Rating System in Blogger
There are many post rating systems out there, but the problem is that which one is the best, flexible and easy to use. While I was searching for a post rating system, I came to rating-widget.com, that's flawlessly the best post rating system. Using rating-widget.com, you can create a post rating system for almost all blogging platforms (Blogger, Wordpress, Wix). No skills are required for creating a post rating system using rating-widget. So, today in this tutorial we'll show you that How to Add a Post Rating System in Blogger.

How to Add a Post Rating System in Blogger

First of all, go to http://rating-widget.com/get/rating/ and select Blogger platform from the list. If you are an expert then you may select JavaScript and add it manually to your blog.
How to Add a Post Rating System in Blogger
You'll see a plenty of options for customizing your widget like styles, themes, colors, font, start etc. Customize your widget, and once you're done, click Sign Up and Add to Blogger button. You can Sign Up using your Facebook, Twitter and LinkedIn account or sign up with your Email.
How to Add a Post Rating System in Blogger
After Signing in click the orange Add to Blogger button or you can also copy the source code by pressing Source Code button and paste it anywhere in your blog to show your rating widget.
How to Add a Post Rating System in Blogger
Congratulations: You've successfully added a Post Rating System to your Blogger Blog.

We hope this article may have helped your in learning How to Add a Post Rating System in Blogger. Share this article with your friends, don't forget to subscribe us and Join our Bloggers Forum on Facebook @ https://www.facebook.com/groups/blogolectforum

How to Display IP Address of your Users in Blogger

- 5 Comments
Are you looking to display the IP Address of your visitors on your Blogger Blog? IP Address (Internet Protocol Address) is a numeric value assigned to each device (e.g. computer) that is connected to a computer network and uses it for Communication.
How to Display IP Address of your Users in Blogger
There are numerous reasons why a person would like to display IP Address on his/her blog. Recently, one of our visitors asked us that He want to display the IP Address of his users on his blog. So, to fulfill his request today in this tutorial we'll show you that How to Display IP Address of your Users in Blogger. This widget display IP Address, Country, Region, City, City Longitude and City Latitude of the visitor.

How to Display IP Address of your Users in Blogger

First and foremost Log in to your Blogger Account >> Select a Blog >> Click Layout >> Add a Gadget, a popup will appear with the list of gadgets. Select HTML/JavaScript gadget from the list of Gadgets. Now Copy (Ctrl+C) the below code and Paste (Ctrl+V) it in the widget code area.

<img src="http://widget.addgadgets.com/ipaddress/" alt="Weather Widget">

Click Save button and you're done.

Congratulations: Now your visitors will be able to see their IP Address on your blog. The information displayed in the widget is temporary and changes according to visitors.

We hope this article may have helped you in learning How to Display IP Address of your Users in Blogger. Share this trick with your friends, don't forget to subscribe us and Join our Bloggers Forum on Facebook @ https://www.facebook.com/groups/blogolectforum

How to Customize Popular Posts Widget in Blogger

- 27 Comments
Are you fed up because of the yucky and unclean design of the blogger Popular Posts Widget? Do you want to make your Popular Posts widget more prominent and attractive for your readers? Popular Posts is a widget provided by blogger, which allows you to display Popular Posts on your sidebar or footer. This widget shows the most visited posts of a blog, you have four different combinations for displaying this widget i.e.

1- Only the title of the post
2- Post title with summary
3- Post title with image thumbnail
4- Post title with image thumbnail and summary

Having a popular posts widget in the sidebar has a lot of advantages. It helps your visitors to check the most visited/popular posts of your blog, it encourages your visitors to navigate your content and the visitors will get more interested in your content. Therefore, if you want to stylize/customize the popular posts widget, and you want to make it more attractive for your visitors. In this article, we'll show you that How to Customize Popular Posts Widget in Blogger. Let's begin:
How to Customize Popular Posts Widget in Blogger

How to Customize Popular Posts Widget in Blogger

First and foremost, Log in to your Blogger Account >> Select a Blog >> Template and click Edit HTML. Click inside the template code area and by using Ctrl+F search for the ]]></b:skin> tag. Now copy the below code and paste it just above/before it (]]></b:skin> Tag)

.PopularPosts {
background: #fff; 
}
.popular-posts ul {
  margin: 0 !important;  padding: 0 !important; 
}
.PopularPosts img {  background: #fff;  border: 3px solid #CCCCCC;  display: block;  float: left;  height: 48px;  margin-right: 8px;  padding: 2px;  width: 48px;  
}
.PopularPosts .widget-content { 
font-size: 15px;  margin: 0 !important; 
}
.popular-posts ul li { 
list-style: none;  border-bottom: 1px solid #ccc;  border-top: 1px solid #FFFFFF;  padding: 0 !important;
}
.popular-posts ul li:hover {
background: #fafafa;  text-decoration: none; 
}
.popular-posts ul li a {
  color: #404040;  display: block; 
}
.popular-posts ul li a:hover { 
color: #262626;  text-decoration: none; 
}

Hit the Save Template button and you're done.
Congratulations: You've successfully customized your popular posts widget.

From Editors Desk

We hope this article may have helped you in customizing popular posts widget. Share this article with your friends, don't forget to subscribe us and Join our Bloggers Forum on Facebook @ https://www.facebook.com/groups/730927093629291

How to Customize Labels Cloud Widget in Blogger

- 5 Comments
Do you want to make your Labels Cloud widget more prominent and attractive for your visitors? Labels Cloud is a widget provided by Blogger, that allow you to arrange your content or categorize your content under specific labels. This widget helps your visitors to easily browse your posts by choosing a specific label or category. This widget makes your blog user friendly. You can add this widget to your sidebar or footer.

The default design of the Labels Cloud widget is simple and not that much attention-grabbing. Therefore, to make it look clean and stylish, we've to customize it. As Blogger is a flexible platform and you can easily customize any element of your blog using CSS. So, we'll also customize the Labels Cloud using CSS3. Recently, one of our visitors asked us that How to Customize Labels Cloud Widget in Blogger. In this article, we'll show you that How to Customize Labels Cloud Widget in Blogger.

Don't Forget to Read:
101 Ways to Increase Your Website Traffic
5 Reasons You'll Quit Blogging Within 3 Months
18 Reasons Why Newbie Bloggers Quit Blogging

How to Customize Labels Cloud Widget in Blogger

First and foremost, Log in to your Blogger Account >> Select a Blog >> Template and click Edit HTML. Click inside the template code area and by using Ctrl+F search for the ]]></b:skin> tag. Now copy the below code and paste it just above/before it (]]></b:skin> Tag)

/*---------Labels Cloud--------*/
.label-size{
margin:0 2px 6px 0;
color:#666;
padding: 7px;
border: solid 1px #C6C6C6;
border-radius: 3px;
text-transform: uppercase;
text-decoration:none;
float:left;
text-decoration:none;
font-size:14px;
color:#666;
}

.label-size:hover {
border:1px solid #6BB5FF;
text-decoration: none;
-moz-transition: all 0.5s ease-out;
-o-transition: all 0.5s ease-out;
-webkit-transition: all 0.5s ease-out;
-ms-transition: all 0.5s ease-out;
transition: all 0.5s ease-out;
}

.label-size a  {
float:left;
text-transform: uppercase;
text-decoration: none;
color:#fff;
}
.label-size a:hover  {
text-decoration: none;
color:#2aa4cf;
}

Hit the Save Template button and you're done.
Congratulations: You've successfully customized your Labels Cloud widget.

From Editors Desk

We hope this article may have helped you in customizing Labels Cloud widget. Share this article with your friends, don't forget to subscribe us and Join our Bloggers Forum on Facebook @ https://www.facebook.com/groups/730927093629291

How to Display Live Visitor Information in Blogger

- 39 Comments
You might have seen websites displaying their live traffic stats in their sidebar. Displaying live traffic stats in the sidebar is an essential way of traffic analyzing. However, have you ever thought about displaying live visitor information in the sidebar of your blog/website? By adding a live traffic stats widget or live visitor counter to your website, you can tell your new visitors that they are not alone who’re visiting your website. This is a simple technique for converting your new readers into daily readers and your followers. So today in this tutorial we'll show you that How to Display Live Visitor Information in Blogger using Feedjit.com
How to Display Live Visitor Information in Blogger

What is Feedjit.com?

Feedjit is a live traffic feed widget which is used by the millions of bloggers worldwide. Some top websites are also using Feedjit for displaying their live traffic stats. Feedjit displays recent visitors, their locations and duration they remain on. Feedjit plays a great role in engaging and creating a live user experience.

Recommended Guides For You:
Browse our Widgets Inventory for more cool widgets.

How to Display Live Visitor Information in Blogger

Go to Feedjit.com. Under the welcome note you'll notice PERSONALIZE YOUR FEEDJIT. Here you can customize your widget. First of all Select a Color Scheme and Customize your Color Scheme. Set the width of your widget and choose how many visitors you want to show 1-10 and at the end you'll notice a text Show where visitors came from with a check box. Mark that box if you want to display the visitor location otherwise leave it empty. Once everything is done choose Install feedjit on my Blogger Blog option and click Go button.
How to Display Live Visitor Information in Blogger
It will take you to the new page consisting of the widget code.
How to Display Live Visitor Information in Blogger
Copy that code and go to Blogger Dashboard >> Select a Blog >> Layout >> Add a Gadget >> choose HTML/JavaScript gadget from the list of gadgets and paste the copied code in it. Hit the Save button and you're done.

Share this tutorial with your friends and don't forget to Join our Bloggers Forum on Facebook @ https://www.facebook.com/groups/730927093629291