Don't Miss

Latest Posts
Browsing Category "Blog Design"

How to Create Drop Caps (Big First Letter) in Blogger

- 30 Comments
Hi Bloggers, today I'm sharing an amazing CSS trick known as Drop Caps (Big First Letter). This trick is still being used by some top websites. This trick Enlarges the first letter of each blog post on your blog and gives a unique and professional look to your blog. You might have seen this trick on some top websites. If you ever wished to use this trick on your blog, then you're at the right place. Today in this tutorial I'll show you that How to Create Drop Caps (Big First Letter) in Blogger. Let's begin:

Recommended for You:
How to Create Drop Caps (Big First Letter) in Blogger

How to Create Drop Caps (Big First Letter) in Blogger

First and foremost go to Blogger.com and log in to your Blogger Account. Go to Template >> Edit HTML >> Click inside the code area >> Press Ctrl+F to search and search for the below tag

]]></b:skin>

 Now copy the below code and add it just above/before it (]]></b:skin>)

.capital:first-letter {
color: #000000;
float: left;
margin:0px 5px 0 0;
font-size: 38px;
font-family: Times, serif, Georgia;
display: block;
padding:0 0 0 10px;
}

Now again search for the below tag

<data:post.body/>

And then add the green tags before and after it as shown below

<div class='capital'><data:post.body/></div>

Click Save Template button and check your blog. If the above code is not working then try the below two methods (Skip the above line and try the below one, add the green codes before and after)

<p class="capital"><data:post.body/></p>

Or Try this:

<span class="capital"><data:post.body/></span>

Finally Click Save Template button and you're done!

We hope this article may have helped you in learning How to Create Drop Caps (Big First Letter) in Blogger. Share this article with your friends and don't forget to subscribe us!

How to Create a Drop Down Menu in Blogger

- 15 Comments
A navigation menu/drop down menu makes your blog/website user-friendly by allowing your visitors to easily navigate your blog posts by just selecting categories from the menu. A navigation menu plays an important role in your blog development, either its a top website like Mashable or a newly created blog, a drop down menu is an essential element of every website. It makes your blog user-friendly, easy to navigate and also adds a new and unique look to your design and makes it look professional. After reading all these advantages if you want to add a Drop Down menu to your Blog/Website, then in this tutorial we'll show you that how to create a Drop Down Menu in blogger. The credit goes to MBT. The design we're going to share today is simple, clean and will surely attract your visitors.
How to Create a Drop Down Menu in Blogger

How to Create a Drop Down Menu in Blogger

First and foremost, log in to your Blogger Account >> Select a Blog >> Template and click Edit HTML. Click inside the template code area and by using Ctrl+F search for the ]]></b:skin> tag. Now copy the below code and paste it just above/before it (]]></b:skin> Tag)

body {
margin: 0px;
}
#menu{
background: #3EA9AC;
color: #fff;
height: 40px;
text-transform:uppercase;
border-bottom: 2px solid #3EA9AC;
box-shadow: 1px 2px 9px #B1B1B1;
border-top: 1px solid #3EA9AC;
}
#menu ul,#menu li{margin:0 auto;padding:0 0;list-style:none}
#menu ul{height:45px;width:1024px}
#menu li{float:left;display:inline;position:relative;font:'Open Sans',Helvetica,Arial,sans-serif;text-shadow: 1px 2px 4px #838383;}
#menu a{display: block;
line-height: 40px;
padding: 0 14px;
text-decoration: none;
color: #fff;
}
#menu li a:hover{
color: #E4E4E4;
-webkit-transition: all .1s ease-in-out;
-moz-transition: all .1s ease-in-out;
-ms-transition: all .1s ease-in-out;
-o-transition: all .1s ease-in-out;
transition: all .1s ease-in-out;
background: #5FC6EB;
}
#menu input{display:none;margin:0 0;padding:0 0;width:80px;height:30px;opacity:0;cursor:pointer}
#menu label{font:'Open Sans',Helvetica,Arial,sans-serif;display:none;width:35px;height:36px;line-height:36px;text-align:center}
#menu label span{font-size:16px;position:absolute;left:35px}
#menu ul.menus{
height: auto;
overflow: hidden;
width: 170px;
background: #3EA9AC;
position: absolute;
z-index: 99;
display: none;
}
#menu ul.menus li{
display: block;
width: 100%;
font:'Open Sans',Helvetica,Arial,sans-serif;
text-transform: none;
text-shadow: none;
border-bottom: 1px dashed #31AFDB;
}
#menu ul.menus a{
color: #FFF;
line-height: 35px;
}
#menu li:hover ul.menus{display:block}
#menu ul.menus a:hover{
background: #5FC6EB;
color: #FFF;
-webkit-transition: all .1s ease-in-out;
-moz-transition: all .1s ease-in-out;
-ms-transition: all .1s ease-in-out;
-o-transition: all .1s ease-in-out;
transition: all .1s ease-in-out;
}

Now again Search for the <body> tag and just below it add the following code

    <nav id='menu'>
    <input type='checkbox'/>
    <label>&#8801;<span>Blogolect</span></label>
    <ul>
    <li><a href='/'>Home</a></li>
    <li><a href='#'>Contact</a></li>
    <li><a href='#'>Drop Down 1<font size='1'>&#9660;</font></a>
    <ul class='menus'>
    <li><a href='#'>Tab No 1</a></li>
    <li><a href='#'>Tab No 2</a></li>
    <li><a href='#'>Tab No 3</a></li>
    <li><a href='#'>Tab No 4</a></li>
    <li><a href='#'>Tab No 5</a></li>
    <li><a href='#'>Tab No 6</a></li>

    </ul>
    </li>
    <li><a href='#'>Services</a></li>
    <li><a href='#'>Drop Down 2<font size='1'>&#9660;</font></a>
    <ul class='menus'>
    <li><a href='#'>Tab No 1</a></li>
    <li><a href='#'>Tab No 2</a></li>
    <li><a href='#'>Tab No 3</a></li>
    </ul>
    </li>
    <li><a href='#'>Advertise</a></li>
           </ul>
        </nav>

  • Replace Blogolect with your Blog name
  • Replace # with the Links and rename the categories

Finally click Save Template button and you're done!

From Editors Desk

We hope this article may have helped you in creating a drop down menu for your blog. Share this article with your friends and don't forget to subscribe us!

How to Customize Popular Posts Widget in Blogger - Numbered

- 11 Comments
Popular posts is a widget provided by blogger. It displays popular posts/most viewed posts of your blog. By default, the design of blogger default popular posts is ugly and not attention grabbing, that's why we need to customize it. You can try four different combinations for displaying this widget i.e.

1- Only the title of the post
2- Post title with summary
3- Post title with image thumbnail
4- Post title with image thumbnail and summary

Recommended for you:
3 Different Popular Posts Styles for Blogger
Add 2 Stylish Custom Popular Posts Widget to Blogger
Multi-Colored Popular Posts widget for Blogger
How to Customize Popular Posts Widget in Blogger 

Having a popular posts widget has lots of advantages. It encourages your visitors to surf more and check the most viewed articles of your blog. It decreases your bounce rate as people surf and spend more time on your blog. So, if you want to turn your simple popular posts style to a stylish one and you want to attract your visitors. In this article, we'll show you that How to Customize Popular Posts Widget in Blogger.
Customize Popular Posts Widget in Blogger

How to Customize Popular Posts Widget in Blogger

First and foremost, add the default popular posts widget by going to Layout >> Add a Gadget >> Select Popular Posts Gadget from the list and click Save button.

Now, log in to your Blogger Account >> Select a Blog >> Template and click Edit HTML. Click inside the template code area and by using Ctrl+F search for the ]]></b:skin> tag. Now copy the below code and paste it just above/before it (]]></b:skin> Tag)

.popular-posts ul li a {
    background: none repeat scroll 0 0 #4E5563;
    color: #FFFFFF;
    display: block;
    margin: 10px 0;
    padding: 25px 15px 30px;
    position: relative;
    text-decoration: none;
    transition: all 0.3s ease-out 0s;
 width: 87%;
}
.popular-posts ul li a:before {
    background: none repeat scroll 0 0 #373C45;
    color: #FFFFFF;
    font-weight: 700;
    height: 2em;
    line-height: 2em;
    margin-left: 88%;
    padding: 2px;
    position: absolute;
    text-align: center;
    width: 2em;
    border:1px solid white;
    transition: all 0.2s ease-in-out 0s;
   -moz-transition: all 0.3s ease-in-out 0s;
}
.popular-posts ul li a:hover {
    opacity: 0.8;
}
.popular-posts ul li a:hover:before {
    border-left-color: #CCCCCC;
}
.popular-posts ul li:first-child + li + li + li + li + li + li + li + li + li a:before {
    content: "10";
}
.popular-posts ul li:first-child + li + li + li + li + li + li + li + li a:before {
    content: "9";
}
.popular-posts ul li:first-child + li + li + li + li + li + li + li a:before {
    content: "8";
}
.popular-posts ul li:first-child + li + li + li + li + li + li a:before {
    content: "7";
}
.popular-posts ul li:first-child + li + li + li + li + li a:before {
    content: "6";
}
.popular-posts ul li:first-child + li + li + li + li a:before {
    content: "5";
}
.popular-posts ul li:first-child + li + li + li a:before {
    content: "4";
}
.popular-posts ul li:first-child + li + li a:before {
    content: "3";
}
.popular-posts ul li:first-child + li a:before {
    content: "2";
}
.popular-posts ul li:first-child a:before {
    content: "1";
}
.item-snippet {
    display: none;
}
.PopularPosts .item-thumbnail {
    display: none;

Hit the Save Template button and you're done.
Congratulations: You've successfully customized your popular posts widget.

From Editors Desk

We hope this article may have helped you in customizing popular posts widget. Share this article with your friends, don't forget to subscribe us and Join our Bloggers Forum on Facebook @ https://www.facebook.com/groups/730927093629291

How to Create a Three Column Footer Widget in Blogger

- 19 Comments
Have you ever thought about having an extra space in your blog footer section for adding more widgets to your blog? You might have seen three column footer widgets section on many websites. Most of the templates come with built-in footer sections, but if unluckily your template doesn't contains a footer and you want to add it! Don't worry, we'll help you in creating a three column footer in blogger.

Recommended for You:
Create a jQuery Sliding Menu with Expand/Collapse Function in Blogger
Add a Tabbed Table of Contents to your Blogger Blog
How to Create an Advanced Admin Control Panel in Blogger

If your sidebar is loaded with various widgets and you want to add more widgets without removing them. Then footer section is the best solution. By creating a footer section in your blog, you can add more widgets to your blog in the footer section. So, today in this tutorial we're going to share How to Create a Three Column Footer Widget in Blogger.
How to Create a Three Column Footer Widget in Blogger

How to Create a Column Footer in Blogger

First of all, log in to your Blogger Account >> Select a Blog >> Template >> Click Edit HTML and search for the ]]></b:skin> tag. Now copy the below CSS code and paste it just above/before it (]]></b:skin> tag)

/* -----   Footer Start   ----- */
#footer {
       margin:auto;
       padding: 0px 0px 10px 0px;
       width: 100%;
       background:#333434;
}
#footer-wrapper {
       margin:auto;
       padding: 20px 0px 20px 0px;
       width: 960px;
}

#footercol-wrapper {
       background:#333434;
       float: left;
       margin: 0px 5px auto;
       padding-bottom: 20px;
       width: 32%;
       text-align: justify;
       font-size:100%;
       line-height: 1.5em;
       word-wrap: break-word;
       overflow: hidden;
       color:#fff;
}

.footercol {margin: 0; padding: 0;}
.footercol .widget {margin: 0; padding: 10px 20px 0px 20px;}

.footercol h2 {
      margin: 0px 0px 10px 0px;
      padding: 3px 0px 3px 0px;
      text-align: center;
      color:#fff;      text-transform:uppercase;
      font-family:'Skolar Bold',Palatino,"Cambria","Droid Serif","Georgia","Times New Roman","Times",serif;
      font-size:21px;
      border-bottom:2px solid #fff;
}

.footercol ul {
      margin: 0px 0px 0px 0px;
      padding: 0px 0px 0px 0px;
      list-style-type: none;
}

.footercol li {
      margin: 0px 0px 2px 0px;
      padding: 0px 0px 1px 0px;
      border-bottom: 1px solid #ccc;
}
/* -----   Footer End   ----- */

Again search for </body> tag and just above/before it add the following code

<div id='footer'>
<div id='footer-wrapper'>
<div id='footercol-wrapper'>
<b:section class='footercol' id='footercol1' preferred='yes'>
</b:section>
</div>
<div id='footercol-wrapper'>
<b:section class='footercol' id='footercol2' preferred='yes'>
</b:section>
</div>
<div id='footercol-wrapper'>
<b:section class='footercol' id='footercol3' preferred='yes'>
</b:section>
</div>
<div style='clear: both;'/>
</div> </div>

Finally click Save Template button and you're done!
Now go to Layout and start adding widgets to your footer section.

For your Information:
  • background:#333434; The background color of the footer section, you can change it according to your website colors
  • background:#333434; The background color of the widget columns. In my case the backgrounds of both footer section and widget columns is same
  • color:#fff; The color of Widget Title

We hope this article may have helped you in creating a a Three Column Footer Widget in Blogger. Share this article with your friends, don't forget to subscribe us and Join our Bloggers Forum on Facebook @ https://www.facebook.com/groups/blogolectforum

30 Handpicked Blogger Widgets and Plugins

- 7 Comments
Blogger is one of the best blogging platforms. No doubt! that blogger is now emerging as a powerful opponent of other platforms like wordpress etc. Its flexible and easy to use. You don't have to pay a penny for creating a blog on blogger and no skills are required for starting your blog. The main purpose of creating Blogolect was to help newbies in improving their skills. BGT has always shared high quality and professional articles on blogging. Hundreds of tutorials on blogging are available at blogolect. A part of all these tutorials, BGT has always created and promoted blogger widgets. There are 90+ blogger widgets & plugins available in our widgets inventory. After sharing hundreds of tutorials and widgets, today we're presenting a collection of 30 Handpicked Best Blogger Widgets and Plugins. So lets begin:
Recommended For You::
Why You Should Choose Blogger ? 
How to Create a Blogger Blog - Beginner's Series
101 Ways to Increase Your Website Traffic

1- Flat UI Email Subscription Widget

Email Subscription Boxes are one of the best ways that bloggers use for increasing their email subscribers. These boxes also help you increasing your Blog Traffic. Here's a Flat style Email Subscription Box for your Blogger Blog.  
Install Now

2- Stylish Numbered Page Navigation for Blogger

Numbered page navigation makes your blog user-friendly by allowing them to easily navigate your blog posts. Here a Stylish numbered page navigation for your Blogger Blog. 
Install Now

3- AddThis Floating Share Buttons for Blogger

Social sharing button make it easy for your visitors to share your blog posts. Using these buttons your visitors will be able to share your posts on their social media profiles with a single click. Add AddThis Floating share button to your Blogger Blog. 
Install Now

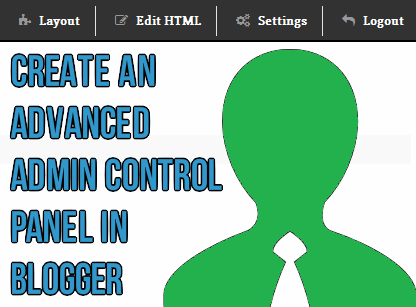
4- Advanced Admin Control Panel for Blogger

Admin Control Panel is a facility for blog administrators to manage their blogs with ease and speed. This Admin Control Panel is only visible to blog administrator (Not to readers/visitors). Only blog administrator will be able to see this navbar/panel when he is logged in to his account.  
Install Now

5- Elegant Email Subscription Box

Another simple and clean email subscription box for your blogger blog. Add it to your blog and increase your email subscribers plus visitors too.  
Install Now

6- jQuery Sliding Menu with Expand/Collapse Function for Blogger

A beautiful jQuery Sliding Menu with hide/show function. This panel contains an About Us section, categories, email subscription form and social media buttons.
Install Now

7- Tabbed Table of Contents for Blogger

Add a Tabbed Table of contents to your blog and let your visitors to access all your blog posts from one page. Be Smart!
Install Now

8- Flat UI Labels Cloud Widget

Labels cloud is widget that allows you to categorize your blog posts under specific categories and make your blog user-friendly by allowing them to easily navigate to your content by selecting labels. Here's a Flat style customization for Labels Widget.
Install Now

9- Multi-Colored Popular Posts Widget

Popular posts is a widget that displays the most visited posts of your blog. As the default popular posts widget is simple and not attention grabbing, so here's a Multi-Colored popular posts widget customization for your blog.
Install Now

10- 2 Advanced Search Boxes for Blogger

Search boxes are one of the most essentials elements of a blog allowing your visitors to easily search for the content they're looking for by typing the keywords. Here are two advanced search boxes for your blogger blog.
Install Now

11- Related Posts Widget with Thumbnails and Summary

Add Related posts widget under your blog posts and let your visitors to check other posts related to that they're reading at that moment. Here's a Related Posts widget with thumbnails and summary for your blog.
Install Now

12- Add a Live Chat Support Widget to Blogger

Increase your sales and users experience by providing them a Live Chat Support widget to contact you easily. If you don't know about adding a Live Chat Support to blog then here's a tutorial about adding Live Chat to your Blog. It hardly take 3-4 minutes to add it.
Install Now

Also Read: Top 4 Live Chat Support Widgets for your Blogger Blog

13- Author Bio Box Widget for Blogger

Let your visitors know who is the man/author behind this blog by adding aa Author Bio Box to your Blogger blog. Here's an author bio box for your Blogger Blog.
Install Now

14- Add Pinterest Pin it Image Hover Button to Blogger

Add a pinterest pin it button to your blog images and increase the chances to get your images pinned by your visitors. Here's a tutorial on how to add Pinterest Pin it button to your blogger blog.
Install Now

15- Facebook Popup Like Box Widget

Increase your Facebook fan page likes by adding a popup Facebook Popup Like box. Here's a beautiful Pop up like box for your Blogger Blog.
Install Now

16- Magazine Style with Post Summaries and Thumbnails for Blogger

Looking to change your simple posts layout to a magazine style. Here's a tutorial for you to Change your Posts to a Magazine Style with thumbnails and summary.
Install Now

17- Create a Sitemap/Table of Contents in Blogger

Another simple Table of contents for your blog. Add this sitemap to your blog and let your visitors to easily access all your blog posts from one page.
Install Now

18- Floating Social Media Sharing button for Blogger

Increase the chances of your content to be shared by your visitors by adding Floating Social Sharing button to your Blog.
Install Now

19- Facebook Popup Like Box Widget for Blogger

Another pop up Like box for increasing your Facebook fan page likes. Add this widget to your blog and increase your likes.
Install Now

20- Social Subscription Widget for Blogger

A simple subscription box with an email subscription form and social media buttons for your blog. Add it to your Blog and increase your social appearance.
Install Now

21- Create a Page Peel Effect in Blogger

A page peel effect for your blogger blog to amaze your visitors. Add it to your Blog now!
Install Now

22- Flat Social Subscription Widget for Blogger

A metro style social subscription widget for your blog. With its stylish and clean design it fits in all templates.
Install Now

23- Customized Labels Cloud Widget

Another stylish customization for Labels cloud widget. Apply this customization to your blog now!
Install Now

24- Back to Top button


Install v1 (Flat Button) - Install v2 - Install v3 (Up and Down Both buttons)

25- Customize the Scroll Bar with JScrollPane

Customize the scroll bar only for your blog using JScrollPane. Here's a tutorial on How to Customize the Scroll Bar with JScrollPane.

Install Now

26- 3 Styles for Popular Posts Widget

3 different customization for your popular posts widget. Choose the one you like and apply it to your Blogger Blog.
Install Now

27- Marquee Notification Bar for Blogger

A top notification bar with a beautiful marquee effect. Display your trending articles on it and notify your visitors about important notifications.
Install Now

28- 9 Beautiful Search Boxes for Blogger

9 beautiful search boxes for your blog. Choose the one you like and implement it to your blog.
Install Now

29- Recent Posts Gadget with Excerpt

Recent posts widget displays the latest posts of your blog. Here's a cool recent posts widget with excerpt and other amazing effects.
Install Now

30- Let Your Visitors Change Your Blog's Background Color

Allow you visitors to change your blog's background only for their computer. Add this widget to your blog now!
Install Now

We hope you find this listing useful. If we missed any widget, please mention it in the comments section below. Do share this article with your friends and give us your feedback about this post in the comments section.  

Join our Bloggers Forum on Facebook @ https://www.facebook.com/groups/blogolectforum and don't forget to subscribe us by email.

How to Customize Labels Cloud Widget in Blogger v3

- 21 Comments
Are you fed up with the ugly design of default blogger Labels Cloud Widget? Do you want to make it more prominent and attention grabbing? Labels Cloud is a Widget provided by Blogger that allows you to categorize your content under specific labels. Labels widget makes your blog user-friendly by allowing your visitors to easily navigate to the content they are looking for by choosing the categories/labels.
Customize Labels Cloud Widget in Blogger v3
The default blogger Labels Cloud widget is simple and leaves a bad impression on your visitors that's why we've to customize it. Labels cloud widget can be easily customized using CSS. If you don't know that how to customize it? Don't worry, in this tutorial we'll show you that How to Turn that Ugly label design into a stylish and clean design. We've designed these labels by using CSS and Animated Gradient effect. Let's begin:

Recommended For You:
How to Customize Labels Cloud Widget in Blogger v1
How to Customize Labels Cloud Widget in Blogger v2
Customized Flat UI Labels Cloud widget for Blogger v1
Customized Flat UI Labels cloud widget for Blogger v2

How to Customize Labels Cloud Widget in Blogger

First and foremost, Log in to your Blogger Account >> Select a Blog >> Template and click Edit HTML. Click inside the template code area and by using Ctrl+F search for the ]]></b:skin> tag. Now choose a style from the below three styles, copy its code and paste it just above/before it (]]></b:skin> Tag)

Note: There is no difference in the coding of the below three styles. The only difference is their colors, we did this to show you that there is nothing technical if you want to match its color with your blog theme. You can change the color by changing the bolded text in the CSS code and use our Color Code Generator 1 and Color Code Generator 2 for HTML color codes.

Style# 1

How to Customize Labels Cloud Widget in Blogger
.label-size {
  position:relative;
  text-transform: uppercase;
  text-decoration:none;
  font-size:13px;
  font-family:Open Sans;
  color:#fff!important;
}

.label-size a {
  color:#fff!important;
  font-weight:bold;
  padding:8px 10px;
  margin:0 6px 6px 0;
  float:left;
  display:block;
  -moz-transition: all 0.4s ;
  -o-transition: all 0.4s;
  -webkit-transition: all 0.4s ;
  -ms-transition: all 0.4s ;
  transition: all 0.4s ;
  background-image: linear-gradient(#EE4343, #E07C7C);
  background-size: auto 200%;
  background-position: 0 100%;
  transition: background-position 0.5s;border-bottom:3px solid #000000;
}

.label-size a:hover {
  background-position: 0 0;
}

Style# 2

How to Customize Labels Cloud Widget in Blogger
.label-size {
  position:relative;
  text-transform: uppercase;
  text-decoration:none;
  font-size:13px;
  font-family:Open Sans;
  color:#fff!important;
}

.label-size a {
  color:#fff!important;
  font-weight:bold;
  padding:8px 10px;
  margin:0 6px 6px 0;
  float:left;
  display:block;
  -moz-transition: all 0.4s ;
  -o-transition: all 0.4s;
  -webkit-transition: all 0.4s ;
  -ms-transition: all 0.4s ;
  transition: all 0.4s ;
  background-image: linear-gradient(#00FF3B, #778C7C);
  background-size: auto 200%;
  background-position: 0 100%;
  transition: background-position 0.5s;border-bottom:3px solid #000000;
}

.label-size a:hover {
  background-position: 0 0;
}

Style# 3

How to Customize Labels Cloud Widget in Blogger
.label-size {
  position:relative;
  text-transform: uppercase;
  text-decoration:none;
  font-size:13px;
  font-family:Open Sans;
  color:#fff!important;
}

.label-size a {
  color:#fff!important;
  font-weight:bold;
  padding:8px 10px;
  margin:0 6px 6px 0;
  float:left;
  display:block;
  -moz-transition: all 0.4s ;
  -o-transition: all 0.4s;
  -webkit-transition: all 0.4s ;
  -ms-transition: all 0.4s ;
  transition: all 0.4s ;
  background-image: linear-gradient(#8A8C8B, #1A1D1B);
  background-size: auto 200%;
  background-position: 0 100%;
  transition: background-position 0.5s;border-bottom:3px solid #000000;
}

.label-size a:hover {
  background-position: 0 0;
}

Finally click Save Template button and you're done.

We hope this article may have helped you in learning How to Customize Labels Cloud Widget in Blogger. Share this article with your friends and don't forget to subscribe us!

Create a jQuery Sliding Menu with Expand/Collapse Function in Blogger

- 7 Comments
jQuery Sliding Menu is actually a type of navigation menu for blogger. It expands sliding from top on clicking the Open Menu button and on pressing the Hide Me button it collapses. If your blog has no space for adding subscribe buttons and email subscription form, then don't worry this menu is going to fulfill all your needs.

If you're tired of using those simple Drop Down menus then this menu will give your blog a new professional look by its simple, clean and professional design. This menu consists of four different portions, the first one is for Author Bio, the 2nd contains a simple Search Box, the next one is Categories where you can add all your Blog Categories and the 4th portion contains an Email subscription box and social media buttons. In this tutorial we'll show you that How to Create a jQuery Sliding Menu with Expand/Collapse Function in Blogger.
jQuery Sliding Menu Expand/Collapse Function Blogger

Create a jQuery Sliding Panel Menu in Blogger

First and foremost, log in to your Blogger Account >> Select a Blog >> Template >> click Edit HTML and Search for the </head> tag. Now copy the below CSS code and paste it just above/before it

<style>
.clearfix:after {content: ".";display: block;height: 0;clear: both;visibility: hidden;}
.clearfix {display: inline-block;}
* html .clearfix {height: 1%;}
.clearfix {display: block;}
.clearfix {height: 1%;}
.clearfix {display: block;}

.tab {
background: url(https://blogger.googleusercontent.com/img/b/R29vZ2xl/AVvXsEhYGhAmhmMnUcVWzFRhRPIVHKzaUKlsev4C7uX-K7yp_l_E65N_cXkuiHDtjm_wKSU7zYzqE93ozM57vPS4f1gwdex_meUBt7XjCzL3adQMDxMceP7aGGeaudaHBhG5fd_fodQqPNl8GhU5/s1600/sliding-panel-tab-0.png) repeat-x 0 0;
height: 42px;
position: relative;
top: 0;
z-index: 999;
}
.tab ul.login {
display: block;
position: relative;
float: right;
clear: right;
height: 42px;
width: auto;
font-weight: bold;
line-height: 42px;
margin: 0;
right: 150px;
color: white;
font-size: 80%;
text-align: center;
}
.tab ul.login li.left {
background: url(https://blogger.googleusercontent.com/img/b/R29vZ2xl/AVvXsEjgSo10ax4RSVgz6M8s272rDIO8mDFoXf7D6Y2Jh78cbKykY01tvK4lJQPbyP_bY2NwMv6NRwLeGl5CxErLW8aXqqiQ7oROkvSq_iaavUJOccqOJM0ExASBds10MVTUdOrdb0E7Ar_B6EW7/s1600/sliding-panel-tab-left.png) no-repeat left 0;
height: 42px;
width: 30px;
padding: 0;
margin: 0;
display: block;
float: left;
}
.tab ul.login li.right {
background: url(https://blogger.googleusercontent.com/img/b/R29vZ2xl/AVvXsEiGRxDCTRS3vf9Fxg0Wt0yVsYE03XbI1NvIz5ixXoruy_oe0zb-X9To4syDuXgJRR15MsFj7kPK80GOc6f6zqIzDOXxnM2sJu3LCbeFyp7IIStyD26YHg01WBc3Lpq9kv5TrAkGZQtNBmKF/s1600/sliding-panel-tab-right.png) no-repeat left 0;
height: 42px;
width: 30px;
padding: 0;
margin: 0;
display: block;
float: left;
}
.tab ul.login li {
text-align: left;
padding: 0 6px;
display: block;
float: left;
height: 42px;
background: url(https://blogger.googleusercontent.com/img/b/R29vZ2xl/AVvXsEiLz8b-Sbipge-tUJVgxpbT31GBP0wEB5GjtLz5L3X716q2NnlsLzXy_nlP07Kjb9IG1B1IxIfK6g5y_VHzDRzKqTHuufLbVZ7ohFWKOzgjz13VWhZvJMybWNDuJaqeIyOakI1hUYq7JBF7/s1600/sliding-panel-tab.png) repeat-x 0 0;
}

.tab ul.login li a {color: #15ADFF;}
.tab ul.login li a:hover {color: #FFFFFF;}
.tab .sep {color:#414141}

.tab a.open, .tab a.close {
height: 20px;
line-height: 20px !important;
padding-left: 30px !important;
cursor: pointer;
display: block;
width: 100px;
position: relative;
top: 11px;
}

.tab a.open {background: url(https://blogger.googleusercontent.com/img/b/R29vZ2xl/AVvXsEimnkUlP5xDO9o669ixFrF-AAXDwvyTuJyxtoPVXoiYEUEpK0kg846UZXU4ckjtFOCIgaNebW2MZn2gEICFEUQPUoVyZOOvOhtRnM05anrirjuN6NazIlKxvBLcgGcGPO8EOf6FqIAIlG8A/s1600/button-open.png) no-repeat left 0;}
.tab a.close {background: url(https://blogger.googleusercontent.com/img/b/R29vZ2xl/AVvXsEgIM8ronLQLlS6JXl_nviTAghBeJpD3-hoA1edipw5BosB4XKddXel7k2yypqGSdYsv8Xfm97sb7nsAAxEX5oofVE3o6rpf4hz0RkcH6igL4GfuPLpxs8tvMlfCIiKtB5BTWlM5G_JOH5Vs/s1600/button-close.png) no-repeat left 0;}
.tab a:hover.open {background: url(https://blogger.googleusercontent.com/img/b/R29vZ2xl/AVvXsEimnkUlP5xDO9o669ixFrF-AAXDwvyTuJyxtoPVXoiYEUEpK0kg846UZXU4ckjtFOCIgaNebW2MZn2gEICFEUQPUoVyZOOvOhtRnM05anrirjuN6NazIlKxvBLcgGcGPO8EOf6FqIAIlG8A/s1600/button-open.png) no-repeat left -19px;}
.tab a:hover.close {background: url(https://blogger.googleusercontent.com/img/b/R29vZ2xl/AVvXsEgIM8ronLQLlS6JXl_nviTAghBeJpD3-hoA1edipw5BosB4XKddXel7k2yypqGSdYsv8Xfm97sb7nsAAxEX5oofVE3o6rpf4hz0RkcH6igL4GfuPLpxs8tvMlfCIiKtB5BTWlM5G_JOH5Vs/s1600/button-close.png) no-repeat left -19px;}

#slide-top-panel {
position: absolute;
top: 0;
width: 100%;
z-index: 999;
text-align: center;
margin-left: auto;
margin-right: auto;
}
#panel {
width: 100%;
height: 230px;
color: #999999;
background: #272727;
overflow: hidden;
position: relative;
z-index: 3;
display: none;
}
#panel h4 {
font-size: 18px;
color: #F2F2F2;
text-align: center;
padding: 5px 0 10px;
margin: 0;
}
#panel p {
margin: 5px 0;
padding: 0px;
}
#panel a {
text-decoration: none;
color: #15ADFF;
}
#panel a:hover {
color: white;
}
#panel .content {
width: 960px;
margin: 0 auto;
padding-top: 15px;
text-align: left;
font-size: 0.85em;
}
#panel .content .left {
width: 280px;
float: left;
padding: 0 15px;
border-left: 1px solid #333;
}
#panel .content .right {
border-right: 1px solid #333;
}
#panel .content form {
margin: 0 0 10px 0;
}
#panel .content label {
float: left;
padding-top: 8px;
clear: both;
width: 280px;
display: block;
}
#panel .content input.field {
border: 1px #1A1A1A solid;
background: #545454;
border-radius: 10px;
margin-right: 5px;
margin-top: 4px;
width: 200px;
color: white;
height: 18px;
}
#panel .content input:focus.field {
background: #7F7F7F;
}
#panel .content input.button-register {
display: block;
clear: both;
height: 24px;
width: 94px;
color: white;
background: transparent url(https://blogger.googleusercontent.com/img/b/R29vZ2xl/AVvXsEiH1Ose_LQyFgbnUrY96rtP5t1vy0DNIegx3lqDChKSwJcvctTkbVbP6X0jyoBvxgF6okALFydf5Dirj8g9aEJdZ6cpwPWp6KMtciYOrEjx4xBDUIBblj_SmoOMEzF6q9wNhP6KtBt4UqH2/s1600/button-register.png) no-repeat 0 0;
text-align: center;
cursor: pointer;
border: none;
font-weight: bold;
margin: 10px auto;
}
#sliding-panel {
width: 160px;
float: left;
}
#sliding-panel2 {
width: 160px;
float: right;
}
#sliding-panel ul, #sliding-panel2 ul{
font-family: Arial, Helvetica, sans-serif;
list-style-type:none;
margin:0;
padding:0;
}
#sliding-panel ul li a, #sliding-panel2 ul li a {
background:url(https://blogger.googleusercontent.com/img/b/R29vZ2xl/AVvXsEgBxBtMVwGjWwcBXS7mlSv_yTBRkKO7Eg-wLXGILNc8SGiH2_SgXWsGx7tXPVnjZfsvPuuwxfllUivlEKLu4OuzUr4NF9cJDG7SWcUVxOOYg1MquhhNOsT-5tA-xAx1Hb3nnqtLAsXgPFfw/s1600/star-bullet.png) center left no-repeat;
margin:0;
padding:3px 3px 3px 18px;
}
#sliding-panel li, #sliding-panel2 li {
display: inline;
}
#sliding-panel a, #sliding-panel2 a{
color: #999999;
text-decoration: none;
font-size: 11px;
display: block;
padding: 3px;
width: 160px;
}
#sliding-panel a:link, #sliding-panel a:visited, #sliding-panel2 a:link, #sliding-panel2 a:visited {
color: #999999;
text-decoration: none;
}
#sliding-panel a:hover, #sliding-panel2 a:hover {
color: #FFFFFF;
}

#search-box22{
margin-top: 20px;
}

#search-box22 input[type="text"] {
float: right;
background: 10px 6px #444;
border: 0 none;
font: bold 12px Arial,Helvetica,Sans-serif;
color: #777;
width: 160px;
padding: 6px 15px 6px 35px;
-webkit-border-radius: 20px;
-moz-border-radius: 20px;
border-radius: 20px;
text-shadow: 0 2px 2px rgba(0, 0, 0, 0.3);
-webkit-box-shadow: 0 1px 0 rgba(255, 255, 255, 0.1), 0 1px 3px rgba(0, 0, 0, 0.2) inset;
-moz-box-shadow: 0 1px 0 rgba(255, 255, 255, 0.1), 0 1px 3px rgba(0, 0, 0, 0.2) inset;
box-shadow: 0 1px 0 rgba(255, 255, 255, 0.1), 0 1px 3px rgba(0, 0, 0, 0.2) inset;
-webkit-transition: all 0.7s ease 0s;
-moz-transition: all 0.7s ease 0s;
-o-transition: all 0.7s ease 0s;
transition: all 0.7s ease 0s;
}

#search-box22 input[type="text"]:focus {
width: 190px;
}

.about-author {
width: 100%;
text-transform: none;
margin-top: 15px;
}
.authorbox {
overflow: hidden;
padding: 0;
width: 100%;
}
.authorbox .authorinfo {
}
.authorbox .authorinfo img {
float: left;
margin: 4px 10px 4px 5px;
border-radius: 100%;
width: 20%;
background: #222;
padding: 5px;
}
.authorbox .authorinfo p {
margin: 0;
padding: 0 5px;
text-align: left;
}
.authorinfo p a {
text-decoration:none;
}
.authorbox h3 {
margin: 0;
display: inline-block;
}
h3.boxtitle {
font-size: 14px;
}
</style>

Important: The height of the panel can be modified by changing the value in height: 230px;
Now search for the <head> tag, copy the below code and paste it just below/after it

<script src='http://ajax.googleapis.com/ajax/libs/jquery/1.4.2/jquery.min.js' type='text/javascript'></script>
<script type='text/javascript'>
$(document).ready(function() {

$(&quot;#open&quot;).click(function(){
$(&quot;div#panel&quot;).slideDown(&quot;slow&quot;);
});

$(&quot;#close&quot;).click(function(){
$(&quot;div#panel&quot;).slideUp(&quot;slow&quot;);
});

$(&quot;#toggle a&quot;).click(function () {
$(&quot;#toggle a&quot;).toggle();
});

});</script>

<b:if cond='data:blog.pageType != &quot;item&quot;'>
<style>
body#layout #slide-top-panel {display:none !important;}
</style>
</b:if>

Finally, search for the <body> tag and add the below code just below/after it

 <!-- Start sliding panel -->
<div id='slide-top-panel'>
<div id='panel'>
<div class='content clearfix'>

<!-- first section -->
<div class='left' style='width:240px !important'>

<h4>Welcome to Your Blog Name</h4>
<div class='about-author'>
<div class='authorbox'>
  <div class='authorinfo'>
<img src='URL-OF-YOUR-PROFILE-PICTURE'/>
<h3 class='boxtitle'>Meet the Author</h3>
<p>Write author bio here.</p>
</div>
</div>
</div>
<p align="right" style="margin-top: 10px;">Search Here</p>
<form method="get" action="/search" id="search-box22">
  <input name="q" type="text" size="40" placeholder="Search..." />
</form>

</div>

<!-- second section -->
<div class='left' style='width:320px !important'>
<h4>Categories</h4>

<div id='sliding-panel'>
<ul>
<li><a href='#'>Category 1</a></li>
<li><a href='#'>Category 2</a></li>
<li><a href='#'>Category 3</a></li>
<li><a href='#'>Category 4</a></li>
<li><a href='#'>Category 5</a></li>
<li><a href='#'>Category 6</a></li>
<li><a href='#'>Category 7</a></li>
</ul>
</div>

<div id='sliding-panel2'>
<ul>
<li><a href='#'>Category 1</a></li>
<li><a href='#'>Category 2</a></li>
<li><a href='#'>Category 3</a></li>
<li><a href='#'>Category 4</a></li>
<li><a href='#'>Category 5</a></li>
<li><a href='#'>Category 6</a></li>
<li><a href='#'>Category 7</a></li>
</ul>
</div>
</div>

<!-- third section -->
<div class='left right' align="center">

<h4>Subscribe to this blog!</h4>
<p style="padding:0px 30px;">Want To Get Hot Updates Directly to your Inbox? Enter your Email below!</p>

<form action='http://feedburner.google.com/fb/a/mailverify?uri=YOUR-FEED-NAME' method='post' target='_blank'>
<input class='field' name='email' type='text/' value=''/>
<input name='uri' type='hidden' value='YOUR-FEED-NAME'/>
<input name='lang' type='hidden' value='en_EN'/>
<input class='button-register' type='submit' value='Subscribe'/></form>

<div align='center' style="clear: both;">
<a href='http://www.facebook.com/username'><img title="Follow on Facebook" src='https://blogger.googleusercontent.com/img/b/R29vZ2xl/AVvXsEjrhYbVmoQK_N8Fkw0bZgdzII9e6IQYa5z7OTSu58E6OWG2QOeH6dGCx1aUJ16lpqgNsraPHN-ko7sWuriIWa95DfX_CWUd4pm6Q6SBljJg1OoFMVwnUYFfLsl7EtordDO68T-dQptpmh9N/s1600/Facebook.png' style='padding:5px;' width='32'/></a>
<a href='http://your-blog-address.blogspot.com/atom.xml'><img title="RSS Feed" src='https://blogger.googleusercontent.com/img/b/R29vZ2xl/AVvXsEi8lW8n7u3Eqkm4yKRHQAaOwXzsD239GL-3C4__MsO14813dWrC5sYHjm_1epJxcAEKYRZh2pmoBEVZFbUAuV8l7ORcM4vdW1V5p9-pFNPk-YtZyDsvK3IZm8kzEeqo7MRgYXZvKTHdENmY/s1600/RSS.png' style='padding:5px;' width='32'/></a>
<a href='https://plus.google.com/username'><img title="Follow on Google" src='https://blogger.googleusercontent.com/img/b/R29vZ2xl/AVvXsEhlTduqtIU5oPV5Qce5RhkOp10_lNbMvsonGr8dKLAXay5GTQyo8-nK4C6WDeRGDTeaztY2ldU0DUZKOvRfUe3F1FpRmbUR-9y0ZWK3jxtuUwTdr3Uq7vcS13AmH5LBSqaXbKPbYs9AjFxq/s1600/Google-plus.png' style='padding:5px;' width='32'/></a>
<a href='http://twitter.com/username'><img title="Follow on Twitter" src='https://blogger.googleusercontent.com/img/b/R29vZ2xl/AVvXsEiKv2yEd2iN9ZGdayQ5Ob-9ifHjDOtnj7M1V-U9DXXyShEqBIfq6a-zyt9bXIR_4cVpNIyIMNDwBECHDLlDZRtslGmd12eFli5l0p-K816gbCBfFBZvD6ZuN2z1pISVfPHvdQV7dstEAxx0/s1600/Twitter.png' style='padding:5px;' width='32'/></a>
</div>

</div>
</div>
</div>

<div class='tab'>
<ul class='login'>
<li class='left'/>
<li>Hello!</li>
<li class='sep'>|</li>
<li id='toggle'>
<a class='open' href='#' id='open'>Open Menu</a>
<a class='close' href='#' id='close' style='display: none;'>Hide Me</a>
</li>
<li class='right'/>
</ul>
</div>
</div>

Replace the highlighted text with your own text and replace all categories with your categories name and # sign with their links. Replace Feed-name with your RSS Feed name and all username with your usernames. After making all the necessary customizations, click Save Template button and you're done!

We hope this article may have helped you in Creating a jQuery Sliding Panel Menu in Blogger. Share this article with your friends and Join our Bloggers Forum on Facebook @ https://www.facebook.com/groups/blogolectforum

How to Use Google Web Fonts in Blogger

- 3 Comments
There are millions of blogs on the internet, competing with each other. But it you want your blog to stand out and impress your visitors, then you've to make some changes to make your blog look different from others.
There are hundreds of elements that you can make different from others and one of them is your blogs font. Yes, you can make your blog look professional by using custom fonts.
How to Use Google Web Fonts in Blogger
Okay, you made this decision, but now you've to find a place where you can get free web fonts. I think that the best place for fonts is Google Web Fonts. Google Web Fonts inventory is full of gorgeous fonts that are extremely flexible and lightweight. There are over 600 fonts available in the Google Web Fonts. All of the fonts hosted, there are free to use in any commercial or personal projects.

Implementing Google Web Fonts in blogger is extremely straightforward. So if you are thinking to Add Google Web Fonts on your Blogger blog, then you're at the right place. Today we'll show you that How to Use Google Web Fonts in Blogger.

How to Use Google Web Fonts in Blogger

First of all go to http://www.google.com/fonts/. There are over 600 fonts available in the Google fonts. Okay now you've to choose your desired font, you'll see all the fonts with their previews and names. You can organize them by their font size and preview text. You can also sort them according to popularity, date added, alphabet, trending and by number of styles.
How to Use Google Web Fonts in Blogger
Once you've decided what font you want to choose click Add to Collection button and then click the Use button. It'll redirect you to the next page. From that page choose you font style i.e. light, normal or bold and scroll down.
How to Use Google Web Fonts in BloggerHow to Use Google Web Fonts in Blogger
After that you'll see the link to sylesheet, which would look like this:

<link href='http://fonts.googleapis.com/css?family=FONTNAME' rel='stylesheet' type='text/css'>

And its CSS style which would look like this:

font-family: 'FONTNAME';

Copy the stylesheet and go to Blogger.com >> Log in to your Blogger Account >> Select a Blog >> Template and click Edit HTML (Don't forget to Backup your Template). Click inside the template code area, use Ctrl+F to search and search for the <b:skin> tag. Just above it paste your font stylesheet code.  
Note: To prevent any error, add a forward slash ( / ) before the closing bracket of the stylesheet code. See the example below:

<link href='http://fonts.googleapis.com/css?family=FONTNAME' rel='stylesheet' type='text/css'>
The above is the stylesheet provided by Google, before adding it to your blog add a forward slash ( / ) before the closing bracket like:
<link href='http://fonts.googleapis.com/css?family=Oswald' rel='stylesheet' type='text/css' />

How to Use Google Web Fonts in Blogger
Finally you've added the stylesheet. To use this font on a specific part of your blog, you've to add the CSS code to its element/code. Copy the CSS code provided by Google and use it where you want. See the example below:

.post-title {font-family: 'FONTNAME'; }
OR
.post-body {font-family: 'FONTNAME'; }

You can use this code anywhere in your blog, just add the CSS to the element where you want to use it. Click the Save Template button and you're done.

From Editors Desk

The method will be difficult for newbies, but if you follow the steps correctly, I don't think that you'll find any difficulty. Share your feedback and suggestions in the comments section below. Do share this article with your friends and don't forget to subscribe us!

How to Change Links Color/Style in Blogger

- 22 Comments
Blog design has always been a great challenge for bloggers. Remember, quality content is not the only thing required for making a blog successful, but we also have to give attention to its design that how your blog looks. If your blog design is clean and attractive, then the visitors will get more interested in your blog. There are thousands of blogger templates available on the internet, but not a single template comes with 100% fulfillment. We have to customize its different sections and elements. Links color is also one of the. If you want to make links more visible and stands out from other text or, want to make the design more attractive to enhance user experience, then its important that you customize your link color/style and that's what we are going to learn today. Today in this tutorial we'll show you that How to Change Links Color/Style in Blogger.
How to Change Links Color/Style in Blogger

How to Change Links Color in Blogger

First and foremost log in to your Blogger Account and go to Template >> Edit HTML. Now look for the CSS code of the hyperlink in your template, which would be something like the below code

a { color:#2aa4cf;}
a:hover { color:#000000; }

The text in bold will be different for every template, simply search for a { tag and you'll find the above code. The first line is for you line style before hover (color:#2aa4cf;) and the seconds line is for the link style on hover (color:#000000; ). So by changing the styles and colors you can easily customize your links style. Use our HTML Color code generator to find your color code.

From Editors Desk

We hope this article may've helped you in learning How to Change Links Color/Style in Blogger. Share it with your friedns and dont forget to subscribe us!
Got a question? Please don't hesitate, ask us in the comments section below.