Create a Stitched Effect Using CSS
Everything is possible with the power of CSS and when it comes to blog design, designers and web developers are using different techniques for customizing their different blog elements. Almost all the customizations are done using CSS. There are thousands of visual effect we can achieve with CSS, the only limit is our imagination.
Today we're going to share a simple CSS trick: Creating a Stitched Effect using CSS, today we'll show you that how to create a stitched effect using CSS. You can use this effect for your heading, or you can also use it for stylizing your navigation menus, sidebar etc. using the CSS Markup. Let's start
 HTML Markup
CSS Markup
For people using Blogger.com, learn How to Add CSS Codes to Blogger Using Template Designer. After adding the CSS Markup and use it anywhere.
Check out some more cool CSS Tricks
Thats all. So, try this simple CSS trick and stylize your blog.
Share this article with your friends and don't forget to Join our Bloggers Forum on Facebook @ https://www.facebook.com/groups/730927093629291
Today we're going to share a simple CSS trick: Creating a Stitched Effect using CSS, today we'll show you that how to create a stitched effect using CSS. You can use this effect for your heading, or you can also use it for stylizing your navigation menus, sidebar etc. using the CSS Markup. Let's start
<div class="stitched">
Stitched
</div>
CSS Markup
.stitched {
background: #2aa4cf;
color: #fff;
font-size: 20px;
font-weight: bold;
line-height: 1.3em;
padding: 10px;
margin: 10px;
border: 2px dashed #000000;
border-radius: 7px;
box-shadow: 0 0 0 4px #2aa4cf, 2px 1px 6px 4px rgba(10, 10, 0, 0.5);
text-shadow: -1px -1px #2aa4cf;
}
For people using Blogger.com, learn How to Add CSS Codes to Blogger Using Template Designer. After adding the CSS Markup and use it anywhere.
Check out some more cool CSS Tricks
Thats all. So, try this simple CSS trick and stylize your blog.
Share this article with your friends and don't forget to Join our Bloggers Forum on Facebook @ https://www.facebook.com/groups/730927093629291


.png "How To Add Multiple Authors To Blogger Blog")
.png "How To Add Multiple Authors To Blogger Blog")

.png "How to Use Google Web Fonts in Blogger")
.png "How to Use Google Web Fonts in Blogger")
.png "How to Use Google Web Fonts in Blogger")
.png "How to Use Google Web Fonts in Blogger")
.png "FormGet Review - An Ultimate Solution for HTML Contact Forms")

.png "FormGet Review - An Ultimate Solution for HTML Contact Forms")
.png "FormGet Review - An Ultimate Solution for HTML Contact Forms")
.png "FormGet Review - An Ultimate Solution for HTML Contact Forms")
.png "FormGet Review - An Ultimate Solution for HTML Contact Forms")
.png "FormGet Review - An Ultimate Solution for HTML Contact Forms")
.png "FormGet Review - An Ultimate Solution for HTML Contact Forms")
.png "FormGet Review - An Ultimate Solution for HTML Contact Forms")

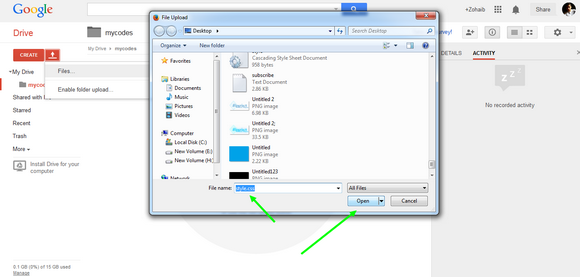
.png "How to Host CSS or JavaScript in Blogger Using Google Drive")
.png "How to Host CSS or JavaScript in Blogger Using Google Drive")
.png "How to Host CSS or JavaScript in Blogger Using Google Drive")
.png "How to Host CSS or JavaScript in Blogger Using Google Drive")
.png "How to Host CSS or JavaScript in Blogger Using Google Drive")
.png "How to Host CSS or JavaScript in Blogger Using Google Drive")


